
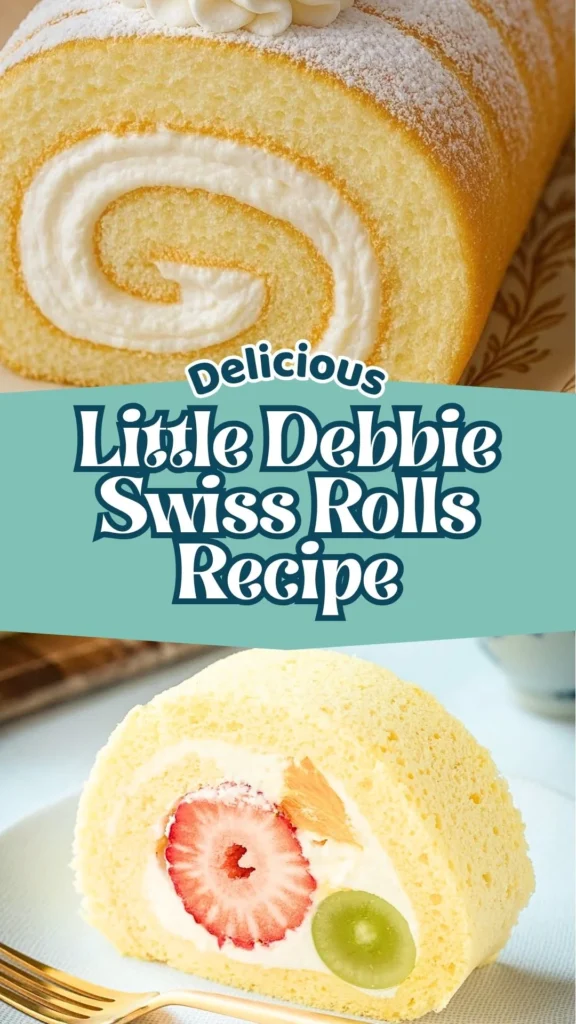
If you grew up sneaking Little Debbie Swiss Rolls from the pantry, you already know that irresistible combination of soft cake, creamy filling, and that satisfying spiral when you unroll one. But what if you could make an even better version right in your own kitchen?
This homemade Little Debbie swiss rolls recipe delivers everything you love about the classic snack cake – and then some. Made with a light Japanese-style sponge cake, a fresh raspberry jam filling, and a real vanilla whipped cream center, these copycat Little Debbie swiss rolls are free from preservatives, endlessly customizable, and genuinely impressive.
Whether you’re making them for a party, a lunchbox treat, or pure nostalgia, this recipe is your new go-to and pairs perfectly with strawberry pie or pecan pie as a delicious side dessert option.
What Do Homemade Little Debbie Swiss Rolls Taste Like?
These homemade swiss rolls little Debbie-style are a beautiful balance of light and indulgent. The sponge cake is pillowy-soft and ever so slightly eggy, with a warm vanilla fragrance that wraps around you like a cozy hug.
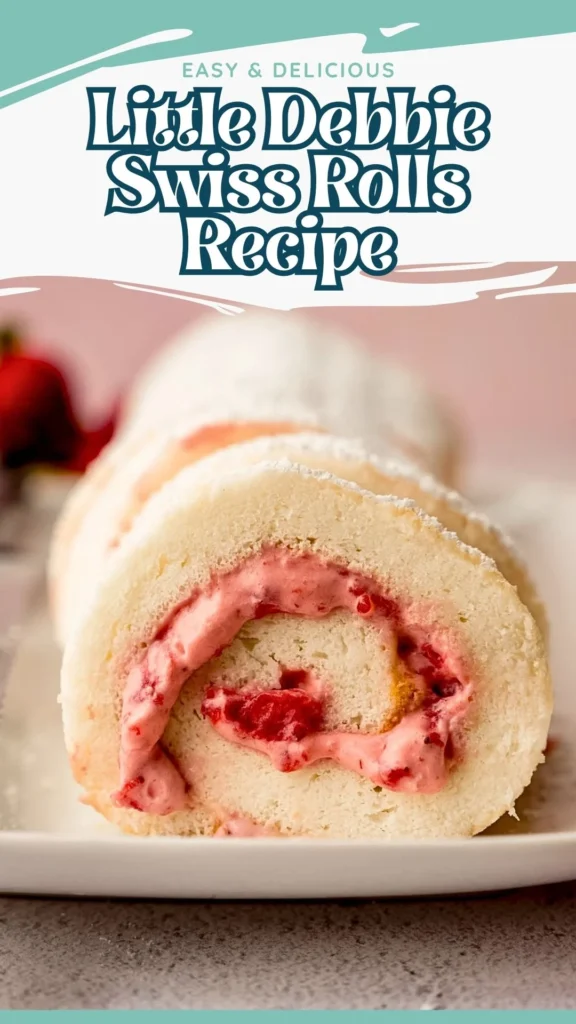
Inside, the tart brightness of fresh raspberry jam cuts through the richness of the lusciously smooth whipped cream filling – a pairing that feels elegant yet completely approachable. Unlike the store-bought version, every bite has a clean, real-ingredient flavor with no waxy coating or artificial aftertaste.
Think of it as a classic Swiss roll cake meets your favorite childhood snack cake – elevated, homemade, and made entirely with ingredients you can actually pronounce.
Little Debbie Swiss Rolls Ingredients
Sponge Cake:
- 80g (⅔ cup) all-purpose flour
- 30g (¼ cup) cornstarch (corn flour)
- ¼ teaspoon baking powder
- ¼ teaspoon salt
- 45g (3 tablespoons) unflavored vegetable oil (e.g. canola)
- 45g (3 tablespoons) room temperature milk
- 6 large eggs (yolks and whites separated)
- 1 tablespoon warm water
- 66g (⅓ cup) white granulated sugar – for yolks
- 2 teaspoons vanilla extract
- 100g (½ cup) white granulated sugar – for whites
Raspberry Jam Filling:
- 110g (1 cup) frozen raspberries
- 6g (¾ tablespoon) cornstarch
- 15g (1 tablespoon) fresh lemon juice
- 38g (3 tablespoons) white granulated sugar
Whipped Cream Filling:
- 400g (1¾ cups) cold whipping cream
- 2 tablespoons icing sugar (confectioners’ sugar)
- ½ teaspoon vanilla extract
Kitchen Utensils You’ll Need
- 18×13 inch (half sheet) baking tray
- Parchment paper / baking paper
- Electric hand mixer or stand mixer
- 3 large mixing bowls
- Offset spatula
- Rubber spatula / scraper
- Fine mesh sifter
- Small saucepan
- Shallow dish (for cooling jam)
- Sharp knife
- Kitchen scale (highly recommended)
- Cooling rack
Preparation Time, Cooking Time & Servings
- Prep Time: 40 minutes
- Bake Time: 18 minutes
- Chill Time: 1 hour 35 minutes
- Total Time: Approximately 2 hours 35 minutes
- Servings: 10 to 12 slices
- Difficulty Level: Intermediate
How to Make Little Debbie Swiss Rolls – Step-by-Step Instructions
Step 1
Prep the Pan and Dry Ingredients Preheat your oven to 170°C (340°F) on convection/fan mode. Line only the bottom of an 18×13 inch baking tray with parchment paper, leaving the sides ungreased.
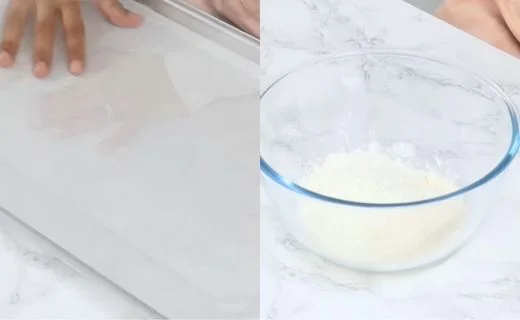
In a bowl, whisk together the flour, cornstarch, baking powder, and salt. In a separate small bowl, mix the vegetable oil and milk together. Set both aside.
Step 2
Whip the Egg Yolks Carefully separate all 6 eggs, making sure absolutely no yolk gets into the whites. In a large bowl, combine the egg yolks, warm water, 66g of sugar, and vanilla extract.
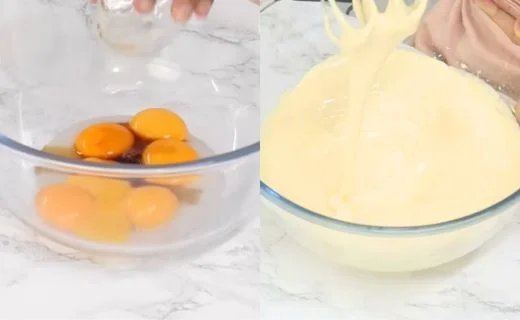
Whip on medium speed for about 5 minutes until the mixture is thick, pale yellow, and falls from the beater in a slow ribbon. Set aside.
Step 3
Make the Meringue In a clean, completely grease-free bowl, begin whipping the 6 egg whites on medium speed. After about 30 seconds, when the mixture looks frothy, gradually add the 100g of sugar while continuing to mix.
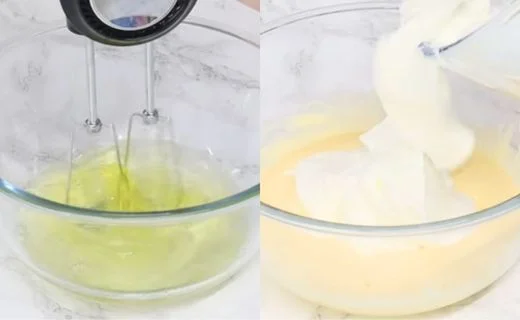
Whip for approximately 7 minutes until soft peaks form. Stop here – do not whip to stiff peaks, or the sponge will crack during rolling.
Step 4
Fold the Batter Together Gently fold half of the meringue into the egg yolk mixture using a rubber spatula. Sift the dry ingredients over the top and fold until just combined – no dry streaks.
Add the remaining meringue and fold until smooth with no white streaks remaining. Finally, add the milk and oil mixture and fold gently until the batter is smooth and flows off the spatula.
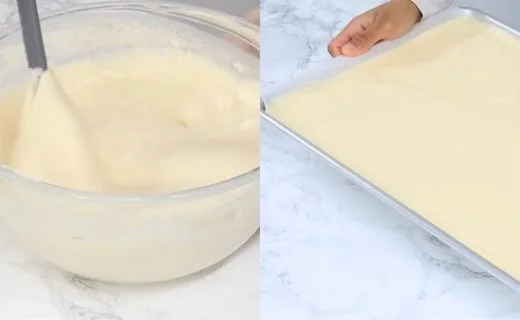
Step 5
Bake the Sponge Pour the batter evenly into the prepared baking tray. Use an offset spatula to spread it into an even layer. Tap the tray on the counter a few times to release any large air bubbles. Bake for 18 minutes, or until the surface is golden and springs back when lightly touched in the center.
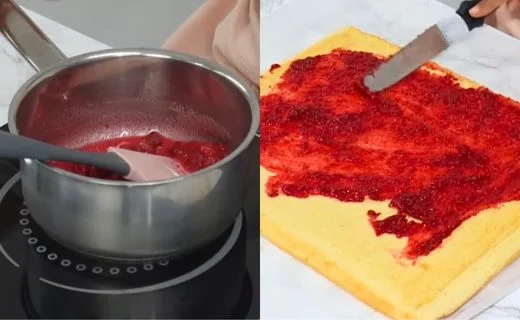
Step 6
Make the Raspberry Jam Filling While the sponge is baking, combine the frozen raspberries, cornstarch, lemon juice, and sugar in a small saucepan over low-medium heat. Stir continuously until the mixture thickens into a spreadable jam consistency. Pour into a shallow dish and refrigerate for at least 15 minutes until completely cool.
Step 7
Cool and Pre-Roll the Sponge Allow the baked sponge to cool in the pan for 15 minutes. Lightly grease a fresh sheet of parchment paper with a very thin layer of oil. Run a knife along the ungreased sides of the pan, then carefully flip the sponge onto the greased parchment paper.
Peel off the original baking paper. Trim the edges if needed for a neat finish. While the sponge is still warm, gently roll it up (without any filling) and let it rest in that shape for 20 minutes. This step trains the cake to roll without cracking later.
Step 8
Whip the Cream Combine the cold whipping cream, icing sugar, and vanilla extract in a chilled bowl. Whip to stiff peaks. Keep refrigerated until you are ready to assemble.
Step 9
Fill and Roll Gently unroll the cooled sponge. Trim the short ends at a slight diagonal angle. Spread a thin, even layer of the cooled raspberry jam across the surface. Then spread an even layer of whipped cream on top, leaving a small 1-inch gap along the far edge.
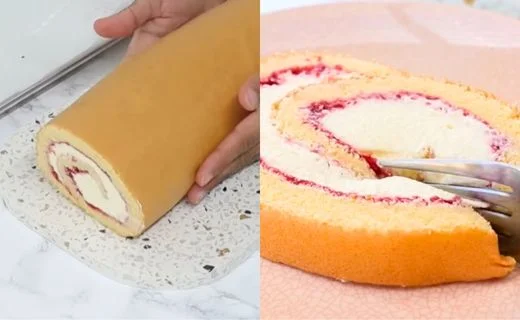
Carefully roll the sponge back up tightly, using the parchment paper to help guide and compress the roll. Wrap the parchment tightly around it and refrigerate for 1 hour to set completely.
Step 10
Slice and Serve Unwrap the parchment paper, trim both ends straight with a sharp knife, and slice into individual swiss rolls. Arrange on a serving plate and enjoy every beautiful, creamy, spiral bite of your homemade Little Debbie swiss rolls!
Customization and Pairing Ideas for Serving
One of the greatest advantages of making this copycat Little Debbie swiss rolls recipe from scratch is the creative freedom it gives you. The base sponge and whipped cream filling are a blank canvas that welcomes endless flavor combinations and serving styles. Here are seven delicious ways to make these swiss rolls little Debbie-style entirely your own.
Chocolate Ganache Coating
For a more indulgent take on this homemade Little Debbie swiss rolls recipe, drizzle or pour a smooth dark chocolate ganache over the finished roll before slicing. Allow it to set in the refrigerator for 15 minutes until the chocolate firms up into a glossy shell. This closely mimics the classic chocolate-coated version that swiss rolls little Debbie fans grew up loving, and it makes each slice look incredibly impressive on a dessert platter.
Seasonal Jam Swaps
The raspberry jam filling is just a starting point. Swap it out for a homemade strawberry jam in summer, a spiced blueberry compote in fall, or a zingy passion fruit curd in winter. Each fruit brings its own personality to the roll and keeps this recipe feeling fresh and seasonal no matter the time of year.
Nutella or Chocolate Cream Filling
Replace the whipped cream with a Nutella-swirled mascarpone cream or a smooth chocolate buttercream for a richer, more decadent filling. This variation is especially popular with kids and turns the recipe into a crowd-pleasing party dessert that rivals any store-bought treat.
Matcha Sponge with Lemon Cream Cheese
Stir 1 tablespoon of high-quality matcha powder into your dry ingredients for a gorgeous, earthy green sponge cake. Pair it with a lemon cream cheese filling in place of the whipped cream for a sophisticated flavor combination that feels modern and bakery-worthy.
Mini Bite-Sized Party Rolls
Slice the finished swiss roll into thinner, bite-sized rounds and arrange them on a tiered cake stand for parties, brunches, or celebrations. Dust lightly with powdered sugar or top each piece with a single fresh raspberry and a small mint leaf for an elegant, Pinterest-worthy presentation that requires almost no extra effort.
Swiss Roll Trifle
One of the most creative recipes using Little Debbie swiss rolls-style homemade cake is a layered trifle. Slice the roll into rounds and layer them in a large glass bowl or individual glass cups with vanilla custard, fresh mixed berries, and extra whipped cream. It is one of the most stunning desserts you can serve at a dinner party with surprisingly little work.
Warm Roll with Ice Cream
Gently warm a slice of swiss roll in the microwave for just 10 seconds and serve it alongside a generous scoop of vanilla bean ice cream and a handful of fresh raspberries. The contrast between the warm, soft sponge and the cold, creamy ice cream is a simple but absolutely restaurant-worthy combination that elevates this homemade treat to another level entirely.
Expert Tips for Perfect Swiss Rolls Every Time
Making swiss rolls from scratch is a rewarding skill, but a few key techniques separate a cracked, messy roll from a flawless, bakery-quality spiral. These tips will help you master exactly how to make Little Debbie swiss rolls perfectly on your very first attempt.
Stop the Meringue at Soft Peaks
This is the single most critical step in this entire recipe. Soft peaks keep the sponge flexible and pliable enough to roll without cracking. If you whip the egg whites to stiff peaks, the sponge structure becomes too rigid and dry, and it will split the moment you try to curl it. Watch the meringue closely and stop the mixer as soon as the peaks gently flop over when you lift the beater.
Pre-Roll the Sponge While Warm
Rolling the unfilled sponge immediately after its initial 15-minute cooling period is what gives the cake its shape memory. This single step is the secret behind how to make Little Debbie swiss rolls that unroll and re-roll without a single crack. The warmth keeps the gluten relaxed and the cake pliable, allowing it to adapt to the rolled shape before it sets.
Use a Kitchen Scale for Accuracy
This homemade Little Debbie swiss rolls recipe depends on precise ingredient ratios, particularly the balance between the egg yolk mixture and the meringue. Using a kitchen scale instead of volume measurements removes the guesswork entirely and gives you consistent, repeatable results every single time you bake.
Keep Everything Cold for the Whipped Cream
Place your mixing bowl and beaters in the freezer for 10 minutes before you start whipping the cream. Cold equipment helps the cream whip faster, reach a more stable structure, and hold its stiff peaks without weeping or softening. This is especially important because the cream filling must remain firm inside the roll during the chilling and slicing stages.
Always Cool the Jam Before Spreading
Spreading warm jam onto freshly whipped cream is a recipe for a melted, sliding mess. Make sure your raspberry jam has been refrigerated for at least 15 minutes and feels completely cool to the touch before you spread it onto the sponge. A firm, cool jam layer stays exactly where you put it and creates a clean, defined layer in the finished spiral.
Leave a Gap at the Far Edge When Filling
When you spread the whipped cream over the sponge, always leave a 1-inch gap along the far short edge. As you roll the sponge toward that far edge, the filling naturally migrates forward under pressure. The gap absorbs that movement and prevents the cream from squeezing out the ends, giving you a clean, neat roll every time.
Always Chill Before Slicing
Refrigerating the fully assembled roll for a minimum of one hour before you cut it is non-negotiable. The chill time allows the whipped cream to firm up, the jam layer to bond with the sponge, and the entire roll to hold its structure cleanly under the knife. Slicing a warm or under-chilled roll will compress the spiral and result in uneven, messy pieces. For the cleanest cuts, use a sharp serrated knife and wipe it clean between each slice.
Storage and Reheating Guidance
Store sliced swiss rolls in an airtight container in the refrigerator for up to 3 days. The whole assembled roll can be wrapped tightly in parchment paper and refrigerated. Do not reheat — serve chilled or at room temperature for the best texture and flavor.
Little Debbie Swiss Rolls Recipe

If you grew up sneaking Little Debbie Swiss Rolls from the pantry, you already know that irresistible combination of soft cake, creamy filling, and that satisfying spiral when you unroll one. But what if you could make an even better version right in your own kitchen? This homemade Little Debbie swiss rolls recipe delivers everything you love about the classic snack cake – and then some.
Ingredients
- 80g (⅔ cup) all-purpose flour
- 30g (¼ cup) cornstarch (corn flour)
- ¼ teaspoon baking powder
- ¼ teaspoon salt
- 45g (3 tablespoons) unflavored vegetable oil
- 45g (3 tablespoons) room temperature milk
- 6 large eggs
- 1 tablespoon warm water
- 66g (⅓ cup) white granulated sugar – for yolks
- 2 teaspoons vanilla extract
- 100g (½ cup) white granulated sugar – for whites
- 110g (1 cup) frozen raspberries
- 6g (¾ tablespoon) cornstarch
- 15g (1 tablespoon) fresh lemon juice
- 38g (3 tablespoons) white granulated sugar
- 400g (1¾ cups) cold whipping cream
- 2 tablespoons icing sugar
- ½ teaspoon vanilla extract
Instructions
Step 1: Prep the Pan and Dry Ingredients Preheat your oven to 170°C (340°F) on convection/fan mode. Line only the bottom of an 18×13 inch baking tray with parchment paper, leaving the sides ungreased. In a bowl, whisk together the flour, cornstarch, baking powder, and salt. In a separate small bowl, mix the vegetable oil and milk together. Set both aside.
Step 2: Whip the Egg Yolks Carefully separate all 6 eggs, making sure absolutely no yolk gets into the whites. In a large bowl, combine the egg yolks, warm water, 66g of sugar, and vanilla extract. Whip on medium speed for about 5 minutes until the mixture is thick, pale yellow, and falls from the beater in a slow ribbon. Set aside.
Step 3: Make the Meringue In a clean, completely grease-free bowl, begin whipping the 6 egg whites on medium speed. After about 30 seconds, when the mixture looks frothy, gradually add the 100g of sugar while continuing to mix. Whip for approximately 7 minutes until soft peaks form. Stop here – do not whip to stiff peaks, or the sponge will crack during rolling.
Step 4: Fold the Batter Together Gently fold half of the meringue into the egg yolk mixture using a rubber spatula. Sift the dry ingredients over the top and fold until just combined – no dry streaks. Add the remaining meringue and fold until smooth with no white streaks remaining. Finally, add the milk and oil mixture and fold gently until the batter is smooth and flows off the spatula.
Step 5: Bake the Sponge Pour the batter evenly into the prepared baking tray. Use an offset spatula to spread it into an even layer. Tap the tray on the counter a few times to release any large air bubbles. Bake for 18 minutes, or until the surface is golden and springs back when lightly touched in the center.
Step 6: Make the Raspberry Jam Filling While the sponge is baking, combine the frozen raspberries, cornstarch, lemon juice, and sugar in a small saucepan over low-medium heat. Stir continuously until the mixture thickens into a spreadable jam consistency. Pour into a shallow dish and refrigerate for at least 15 minutes until completely cool.
Step 7: Cool and Pre-Roll the Sponge Allow the baked sponge to cool in the pan for 15 minutes. Lightly grease a fresh sheet of parchment paper with a very thin layer of oil. Run a knife along the ungreased sides of the pan, then carefully flip the sponge onto the greased parchment paper. Peel off the original baking paper. Trim the edges if needed for a neat finish. While the sponge is still warm, gently roll it up (without any filling) and let it rest in that shape for 20 minutes. This step trains the cake to roll without cracking later.
Step 8: Whip the Cream Combine the cold whipping cream, icing sugar, and vanilla extract in a chilled bowl. Whip to stiff peaks. Keep refrigerated until you are ready to assemble.
Step 9: Fill and Roll Gently unroll the cooled sponge. Trim the short ends at a slight diagonal angle. Spread a thin, even layer of the cooled raspberry jam across the surface. Then spread an even layer of whipped cream on top, leaving a small 1-inch gap along the far edge. Carefully roll the sponge back up tightly, using the parchment paper to help guide and compress the roll. Wrap the parchment tightly around it and refrigerate for 1 hour to set completely.
Step 10: Slice and Serve Unwrap the parchment paper, trim both ends straight with a sharp knife, and slice into individual swiss rolls. Arrange on a serving plate and enjoy every beautiful, creamy, spiral bite of your homemade Little Debbie swiss rolls!
Notes
Store sliced swiss rolls in an airtight container in the refrigerator for up to 3 days. The whole assembled roll can be wrapped tightly in parchment paper and refrigerated. Do not reheat — serve chilled or at room temperature for the best texture and flavor.
Nutrition Information:
Yield:
8Serving Size:
1Amount Per Serving: Calories: 220
Common Queries and FAQs
Everything you need to know about Little Debbie Swiss Rolls Recipe: common questions answered.
Can I make this copycat Little Debbie swiss rolls recipe ahead of time?
Yes! You can bake and pre-roll the sponge up to one day in advance. Wrap it in parchment paper and store it at room temperature. Prepare the jam and whipped cream the next day, assemble the roll, and refrigerate for one hour before slicing and serving.
Why did my swiss roll crack when I tried to roll it?
Cracking is almost always caused by one of two things — the meringue was overwhipped to stiff peaks, or the sponge was allowed to cool completely before rolling. Always roll the sponge while it is still slightly warm, and stop whipping the egg whites the moment soft peaks form.
Can I use fresh raspberries instead of frozen for the jam filling?
Absolutely. Fresh raspberries work just as well as frozen ones. Because fresh berries release their juices more quickly, the cooking time for the jam may be slightly shorter. Cook until the mixture reaches a thick, spreadable consistency, then cool completely before using.
Can I freeze homemade Little Debbie swiss rolls?
Freezing the fully assembled roll with whipped cream filling is not recommended, as the cream tends to separate and become watery after thawing. However, the plain baked sponge cake can be frozen for up to one month. Wrap it tightly in plastic wrap before freezing, then thaw at room temperature before filling and rolling.
What can I substitute for whipping cream in the filling?
A stabilized mascarpone cream made with mascarpone cheese, a small amount of heavy cream, and powdered sugar makes an excellent substitute. Cream cheese frosting is another great option that holds up well at room temperature and pairs beautifully with both the raspberry jam and the vanilla sponge.
How do I get a tighter, neater spiral when slicing?
Refrigerate the finished roll for the full recommended hour before cutting. Use a sharp serrated knife and cut using a gentle back-and-forth sawing motion rather than pressing straight down. Wipe the blade clean between each slice to maintain sharp, defined spirals throughout the entire roll.
Is this the same as a traditional Swiss roll cake?
This recipe uses the classic Swiss roll technique – a thin, pliable sponge baked flat, filled, and rolled into a spiral — but it is specifically crafted to recreate the nostalgic flavor and texture of the store-bought Little Debbie version. The key difference is the addition of real fruit jam, fresh whipped cream, and higher quality ingredients that make the homemade version taste significantly better than the original.
This homemade Little Debbie swiss rolls recipe is proof that your favorite childhood snack cake tastes infinitely better when made from scratch. With a perfectly pliable vanilla sponge, a bright raspberry jam layer, and a cloud-like whipped cream filling, every single slice is a little celebration worth savoring.
Whether you are serving these copycat swiss rolls at a gathering, gifting them to someone special, or simply treating yourself on a quiet afternoon, the result is always worth the effort. Give this recipe a try, share your beautiful spiral with us, and discover why homemade will always win.
You can also follow us on Pinterest, and YouTube for more delicious updates and kitchen inspiration. Your feedback and support mean the world to us!