
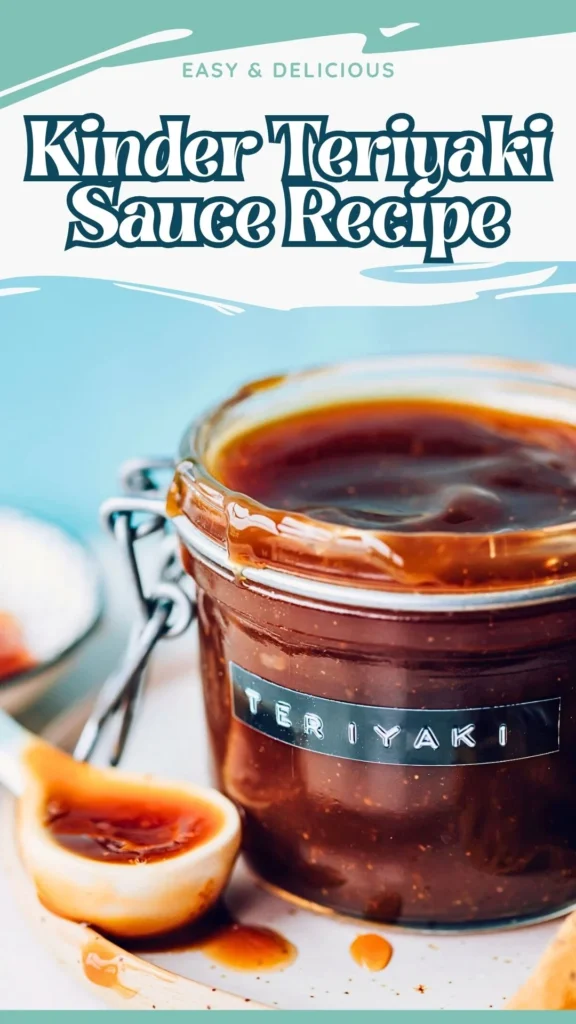
If you’ve ever reached for a bottle of Kinder’s teriyaki sauce at the store, you already know how addictive that deep, savory-sweet glaze can be.
But here’s the thing – making a Kinder teriyaki sauce recipe at home is surprisingly simple, and the result is far fresher, richer, and more satisfying than anything store-bought. With just four pantry staples, you can recreate that signature bold flavor right on your stovetop, perfect for teriyaki steak and pulehu chicken.
This homemade Kinder teriyaki sauce comes together in under 20 minutes and works beautifully as a marinade, glaze, or dipping sauce for your favorite proteins and vegetables.
What Does It Taste Like?
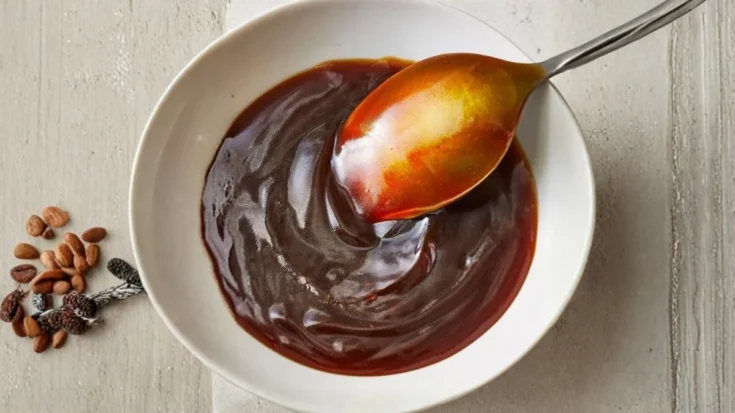
This sauce delivers a beautifully balanced flavor that’s simultaneously sweet, salty, and deeply savory with a subtle umami undertone. The simple teriyaki sauce base – built from soy sauce, mirin, sake, and sugar – develops a rich, slightly caramelized depth when reduced properly.
It carries a glossy, syrup-like consistency that clings to food perfectly without being overpowering. Think of it as sweet soy meets toasty caramel, with a gentle complexity that keeps every bite interesting.
It’s bold enough to stand on its own as a dipping sauce yet refined enough to use as a finishing glaze.
Kinder Teriyaki Sauce Ingredients
Here’s everything you need for this homemade Kinder teriyaki sauce:
- 3 tablespoons cooking sake
- 3 tablespoons mirin (alcohol-free rice vinegar)
- 2 tablespoons sugar
- 3 tablespoons soy sauce
Notes
- No mirin? Use 3 tablespoons cooking sake plus an extra 1 tablespoon sugar (on top of the original 2 tablespoons).
Kitchen Utensils You’ll Need
- Small saucepan or pot
- Wooden spoon or heat-safe silicone spatula
- Measuring spoons
- Small glass jar or airtight container for storage
Preparation & Cooking Time
- Prep Time: 2 minutes
- Cook Time: 15–20 minutes
- Total Time: ~20 minutes
- Yield: Approximately 3–4 tablespoons of finished sauce (concentrated glaze)
- Servings: 2–4 (as a glaze or dipping sauce)
How to Make Kinder Teriyaki Sauce – Step-by-Step Kinder Teriyaki Sauce Instructions
Step 1 – Prepare the flavor base
Add 3 tablespoons apple juice and 3 tablespoons alcohol-free rice vinegar into a small pot. Heat over medium heat for about 1 minute to blend the flavors and slightly mellow the sharpness.
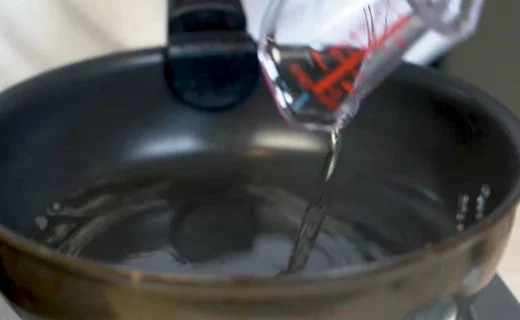
Gently fan the steam toward your nose – when the vinegar smell softens, move on to the next step.
Step 2 – Dissolve the sugar
Add 2 tablespoons of sugar to the pot and stir continuously until it fully dissolves.
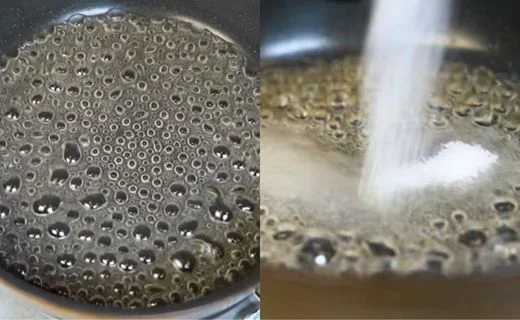
Reduce the heat slightly at this stage to prevent the sugar from catching and burning on the bottom of the pan.
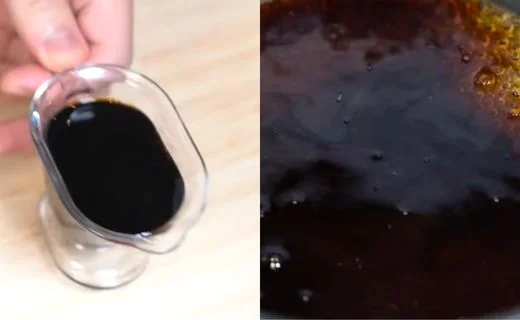
Step 3 – Add the soy sauce
Pour in 3 tablespoons of soy sauce and stir everything together gently to combine.
Step 4 – Simmer and reduce
Continue to simmer over medium-low heat, stirring regularly. As the sauce begins to boil, watch the bubbles closely.
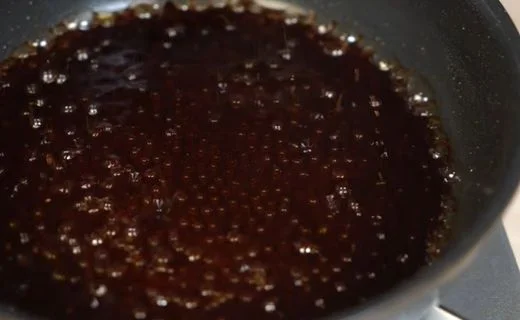
When they start growing larger and slower, lower the heat immediately – this is when burning happens fastest.
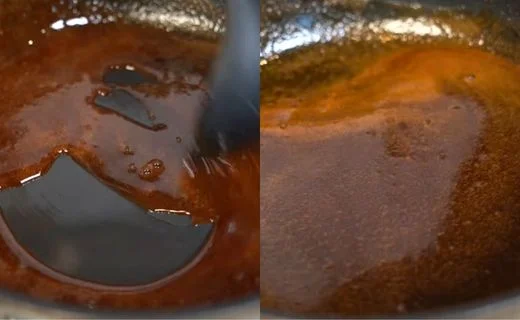
Step 5 – Check the consistency
Reduce the sauce until it reaches approximately one-fifth of its original volume. To test the consistency, drop a small amount into a glass of water. If it dissolves instantly, keep reducing. You’re looking for the sauce to lightly dissolve while sinking – it should fall through the water slowly rather than vanishing right away.
Step 6 – Finish on low heat
As you approach the final consistency, switch to very low heat or simply use residual heat from the pan. Avoid aggressively reducing on medium-high heat at this stage. If the sauce turns whitish, overly thick, and covered in tiny white bubbles – it has burnt. Start a fresh batch if that happens.
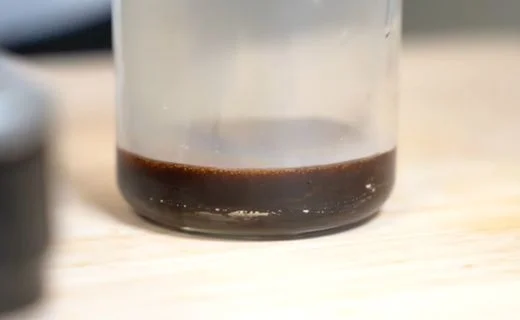
Step 7 – Cool before storing
Once the sauce reaches your desired consistency, turn off the heat and allow it to cool completely before transferring it to a jar or container.
Customization and Serving Ideas for Kinder Teriyaki Sauce
One of the best things about this Kinders teriyaki sauce recipe is how versatile it truly is. Here are seven delicious ways to customize and serve it:
1. Classic Chicken Teriyaki Glaze
Brush the finished sauce over grilled or pan-seared chicken thighs during the last two minutes of cooking. The sauce caramelizes beautifully against the heat and creates that iconic sticky, golden finish everyone loves.
2. Salmon Teriyaki
Teriyaki and salmon are a natural pair. Spoon the sauce over pan-seared salmon fillets just before serving, or use it as a quick marinade for 15–20 minutes before cooking. The richness of the fish balances the sweet soy glaze perfectly.
3. Tofu & Vegetable Stir-Fry
Toss this homemade teriyaki sauce through a hot wok of crispy tofu, broccoli, bell peppers, and snap peas. It coats every piece evenly and transforms a simple stir-fry into a restaurant-quality meal.
4. Rice Bowl Drizzle
A classic teriyaki rice bowl gets an upgrade when you drizzle this thick, glossy sauce over steamed Japanese short-grain rice, sliced protein, pickled vegetables, and sesame seeds. It’s a quick and satisfying weeknight dinner idea.
5. Dipping Sauce for Gyoza or Spring Rolls
Thin the sauce slightly with a splash of warm water and serve it as a dipping sauce alongside pan-fried gyoza, spring rolls, or chicken skewers. The savory-sweet profile makes it crowd-pleasing every time.
6. Burger or Sandwich Spread
Spread a thin layer of this teriyaki glaze onto burger buns or sandwich wraps alongside grilled pineapple, lettuce, and a protein of your choice. It adds a bold, Asian-inspired twist to familiar comfort food.
7. Noodle Sauce Base
Stir a spoonful into cooked soba noodles or udon along with sesame oil, scallions, and shredded chicken for a quick teriyaki noodle dish that comes together in minutes.

Tips for the Best Homemade Kinder Teriyaki Sauce
Getting this simple teriyaki sauce just right comes down to a few key techniques. Keep these tips in mind every time you make it:
1. Always Burn Off the Alcohol First
Never skip the alcohol evaporation step. Cooking sake and mirin both contain alcohol, and if you don’t cook it off before adding the other ingredients, the sauce will carry a sharp, bitter aftertaste. One minute over medium heat is usually enough – trust your nose to confirm it’s ready.
2. Use Low Sodium Soy Sauce If Needed
Traditional soy sauce creates the ideal flavor base for this recipe, but if you’re watching your sodium intake, a low-sodium soy sauce works well without compromising the overall taste. Just keep in mind the final sauce may taste slightly lighter.
3. Stir Constantly During the Final Reduction
The sugar content in this sauce makes it highly prone to burning, especially toward the end of the cooking process. Keep the spatula moving and never walk away during the last few minutes of reduction.
4. The Water Drop Test Is Your Best Friend
Don’t rely solely on visual cues when judging consistency. The water drop test – dropping a small amount of sauce into a glass of cold water – gives you an accurate and reliable read on thickness. This is the same technique used in traditional Japanese cooking to test sauces and syrups.
5. Switch to Residual Heat for the Finish
Once the sauce is close to the desired consistency, turn off the heat and let the residual warmth in the pan do the final work. This gives you far more control and dramatically reduces the risk of over-reducing or burning the batch.
6. Don’t Double the Batch in a Small Pan
If you want to make more sauce, use a wider saucepan rather than just doubling the quantity in a small pot. A wider surface area allows for more even evaporation and better heat distribution, which means more consistent results.
7. Cool Completely Before Storing
Transferring hot teriyaki sauce directly into a sealed jar traps steam, which can water down your carefully reduced glaze and promote bacterial growth. Always let the sauce reach room temperature before sealing and refrigerating.
Storage and Reheating Guidance
Store your finished homemade Kinder teriyaki sauce in an airtight glass jar in the refrigerator for up to 2 weeks. When ready to use, gently reheat in a small saucepan over low heat or microwave in short 10-second intervals, stirring between each.
Kinder Teriyaki Sauce Recipe
If you’ve ever reached for a bottle of Kinder’s teriyaki sauce at the store, you already know how addictive that deep, savory-sweet glaze can be. But here’s the thing – making a Kinder teriyaki sauce recipe at home is surprisingly simple, and the result is far fresher, richer, and more satisfying than anything store-bought. With just four pantry staples, you can recreate that signature bold flavor right on your stovetop.
Ingredients
- 3 tablespoons cooking sake
- 3 tablespoons mirin (alcohol-free rice vinegar)
- 2 tablespoons sugar
- 3 tablespoons soy sauce
- No mirin? Use 3 tablespoons cooking sake plus an extra 1 tablespoon sugar
Instructions
Step 1 – Prepare the flavor base
Add 3 tablespoons apple juice and 3 tablespoons alcohol-free rice vinegar into a small pot. Heat over medium heat for about 1 minute to blend the flavors and slightly mellow the sharpness. Gently fan the steam toward your nose — when the vinegar smell softens, move on to the next step.
Step 2 – Dissolve the sugar
Add 2 tablespoons of sugar to the pot and stir continuously until it fully dissolves. Reduce the heat slightly at this stage to prevent the sugar from catching and burning on the bottom of the pan.
Step 3 – Add the soy sauce
Pour in 3 tablespoons of soy sauce and stir everything together gently to combine.
Step 4 – Simmer and reduce
Continue to simmer over medium-low heat, stirring regularly. As the sauce begins to boil, watch the bubbles closely. When they start growing larger and slower, lower the heat immediately – this is when burning happens fastest.
Step 5 – Check the consistency
Reduce the sauce until it reaches approximately one-fifth of its original volume. To test the consistency, drop a small amount into a glass of water. If it dissolves instantly, keep reducing. You’re looking for the sauce to lightly dissolve while sinking – it should fall through the water slowly rather than vanishing right away.
Step 6 – Finish on low heat
As you approach the final consistency, switch to very low heat or simply use residual heat from the pan. Avoid aggressively reducing on medium-high heat at this stage. If the sauce turns whitish, overly thick, and covered in tiny white bubbles – it has burnt. Start a fresh batch if that happens.
Step 7 – Cool before storing
Once the sauce reaches your desired consistency, turn off the heat and allow it to cool completely before transferring it to a jar or container.
Notes
Store your finished homemade Kinder teriyaki sauce in an airtight glass jar in the refrigerator for up to 2 weeks. When ready to use, gently reheat in a small saucepan over low heat or microwave in short 10-second intervals, stirring between each.
Nutrition Information:
Yield:
8Serving Size:
1Amount Per Serving: Calories: 70
Common Queries & FAQs
Common Kinder Teriyaki Sauce Recipe questions answered to help you understand it better.
What is Kinder’s teriyaki sauce made of?
The core Kinder teriyaki sauce ingredients are cooking sake, mirin, sugar, and soy sauce. These four simple components, when properly reduced, create the signature sweet, savory, and glossy teriyaki glaze that Kinder’s is known for.
Can I make teriyaki sauce without mirin?
Yes. If you don’t have mirin on hand, replace it with 3 tablespoons of cooking sake plus an additional 1 tablespoon of sugar. Mirin adds both sweetness and a slight syrupy body, so the extra sugar helps replicate that quality.
What can I substitute for cooking sake in teriyaki sauce?
Dry white wine is the best substitute for cooking sake in this recipe. It carries a similar acidity and subtle depth without dramatically altering the flavor profile of the finished sauce.
How do I know when my teriyaki sauce is ready?
Use the water drop test. Drop a small amount of the simmering sauce into a glass of cold water. If it dissolves immediately, keep reducing. When it lightly dissolves while sinking – falling slowly rather than vanishing – the consistency is right.
Why did my teriyaki sauce turn white and thick?
This happens when the sauce overheats and the sugars burn. If your sauce turns whitish, becomes overly thick, and develops tiny white bubbles across the surface, it has gone past the point of rescue. The best option is to discard the batch and start fresh.
Can I use this sauce as a marinade?
Absolutely. This simple teriyaki sauce works wonderfully as a marinade for chicken, beef, salmon, or tofu. Marinate proteins for at least 15–30 minutes before cooking for best results. For deeper flavor, marinate overnight in the refrigerator.
Is homemade teriyaki sauce healthier than store-bought?
Generally, yes. This homemade Kinder teriyaki sauce contains no artificial preservatives, no added thickeners, and no hidden additives. You control every ingredient, making it a cleaner, more wholesome alternative to bottled versions.
This Kinder teriyaki sauce recipe proves that the best sauces don’t come from a bottle – they come from your own stovetop with just four honest ingredients. Whether you’re glazing chicken, finishing a salmon fillet, or building out a teriyaki rice bowl, this rich, glossy sauce delivers bold, restaurant-worthy flavor every single time.
Now that you know how to make teriyaki sauce the right way – with proper reduction, the right heat control, and a little patience – there’s really no reason to reach for store-bought again. Give it a try and taste the difference yourself.
You can also follow us on Pinterest, and YouTube for more delicious updates and kitchen inspiration. Your feedback and support mean the world to us!