
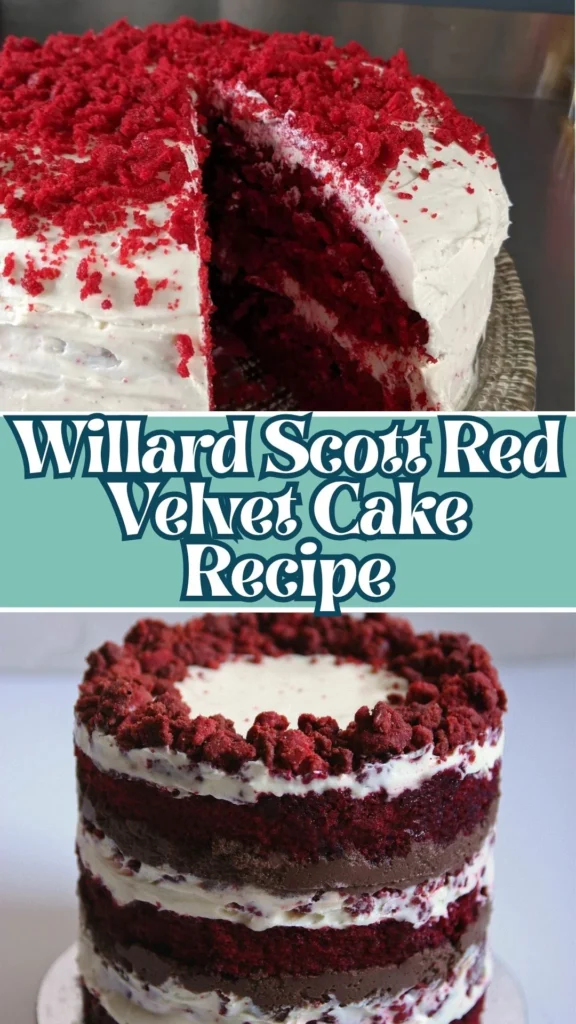
Rich, moist, and beautifully vibrant, the willard scott red velvet cake recipe is a timeless dessert that never fails to impress. Known for its signature red color and delicate cocoa flavor, this cake combines elegance and comfort in every slice.
A great red velvet cake stands out because of its incredibly soft texture and perfectly balanced sweetness. The combination of buttermilk, cocoa powder, and vanilla creates a unique flavor profile that sits somewhere between vanilla cake and chocolate cake, making it a favorite for countless dessert lovers.
Finished with a smooth and tangy cream cheese buttercream frosting, this homemade recipe is ideal for birthdays, holidays, family gatherings, or any special occasion. The simple ingredients and straightforward method make it easy to create a bakery-style red velvet cake right in your own kitchen.
My Experience and How Does This Recipe Taste
The first time I made this willard scott red velvet cake recipe, I was amazed by how soft and moist the cake layers turned out. The combination of butter, oil, and buttermilk creates a rich texture that stays fresh and tender for days.

Flavor-wise, this cake strikes a beautiful balance. The cocoa powder provides a delicate chocolate note without overpowering the cake, while the vanilla and tangy buttermilk add depth and complexity. The vinegar enhances the texture and contributes to the cake’s signature softness.
What truly elevates this dessert is the cream cheese buttercream frosting. It’s creamy, slightly tangy, and perfectly sweet, complementing the fluffy cake layers beautifully. Every bite delivers a velvety texture that makes this cake unforgettable.
Willard Scott Red Velvet Cake Ingredients
For the Red Velvet Cake Layers
- 2¼ cups all-purpose flour
- 3 tablespoons corn flour (cornstarch)
- 3 tablespoons cocoa powder
- ½ teaspoon baking soda
- 1 teaspoon baking powder
- ½ teaspoon salt
- 6 tablespoons (86g) unsalted butter, room temperature
- ¾ cup unflavored vegetable oil
- 1¾ cups white granulated sugar
- 3 large eggs
- 1 tablespoon vanilla extract
- 1½ teaspoons white vinegar
- 3 to 3½ tablespoons red liquid food coloring
- 1 cup buttermilk
And for the Cream Cheese Buttercream Frosting
- 1 cup (225g) unsalted butter, room temperature
- 4½ cups icing sugar
- 1½ cups (335g) cold firm cream cheese
- 1½ teaspoons vanilla extract
- 1½ tablespoons fresh lemon juice
Kitchen Utensils Needed
- Two 8-inch cake pans
- Mixing bowls
- Hand mixer or stand mixer
- Measuring cups and spoons
- Rubber spatula
- Fine mesh sieve
- Cooling rack
- Cake scraper
- Offset spatula
- Cake stand or serving plate
- Piping bag with 1M star tip (optional)
Preparation and Cooking Time
- Preparation Time: 25 minutes
- Cooking Time: 30 minutes
- Cooling Time: 1 hour
- Total Time: Approximately 1 hour 55 minutes
- Servings: 12 slices
Willard Scott Red Velvet Cake Recipe Steps
Step 1: Prepare the Cake Pans
Preheat your oven to 160°C (fan forced). Grease or line two 8-inch cake tins with parchment paper.
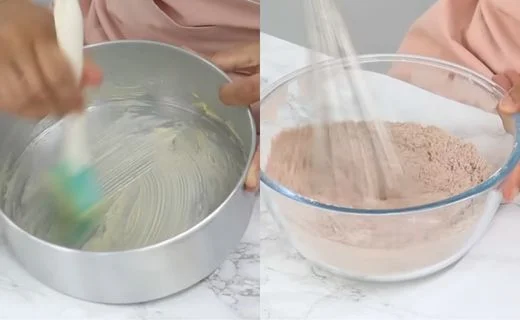
Step 2: Mix the Dry Ingredients
Sift together the flour, corn flour, cocoa powder, baking soda, baking powder, and salt. Whisk thoroughly and set aside.
Step 3: Cream Butter, Oil, and Sugar
In a large mixing bowl, combine the butter, vegetable oil, and sugar. Beat on medium-high speed for 2–3 minutes until the mixture becomes light and creamy.
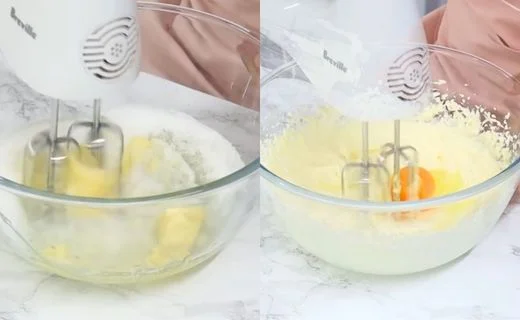
Step 4: Add Eggs and Flavorings
Add the eggs one at a time, mixing well after each addition. Scrape down the bowl as needed. Add the vanilla extract, white vinegar, and red food coloring. Mix until evenly combined.
Step 5: Combine Wet and Dry Ingredients
Add half of the dry ingredient mixture to the batter and gently fold. Pour in the buttermilk and mix lightly.
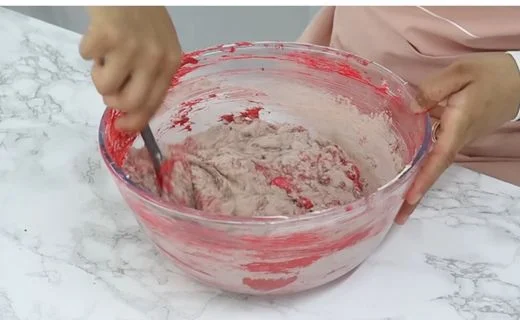
Add the remaining dry ingredients and fold until just combined. Avoid overmixing.
Step 6: Fill and Bake
Divide the batter evenly between the prepared cake pans. Smooth the tops and gently tap the pans on the counter to release air bubbles. Bake for 30 minutes or until a toothpick inserted into the center comes out clean.
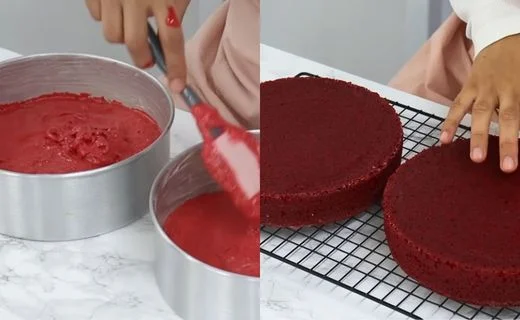
Step 7: Cool the Cake Layers
Allow the cakes to cool in their pans for 20 minutes. Transfer them to a wire rack and cool completely before frosting.
Step 8: Make the Cream Cheese Buttercream
Beat the room-temperature butter for 3–4 minutes until fluffy and pale. Gradually add the icing sugar in three batches, mixing on low speed after each addition.
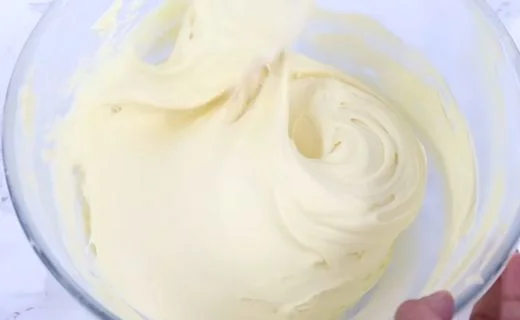
Add the cream cheese, vanilla extract, and lemon juice. Beat until smooth and creamy.
Step 9: Assemble the Cake
Place the first cake layer on a cake stand. Spread a generous amount of frosting evenly across the surface. Position the second layer on top with the flat side facing upward. Frost the top and sides evenly.
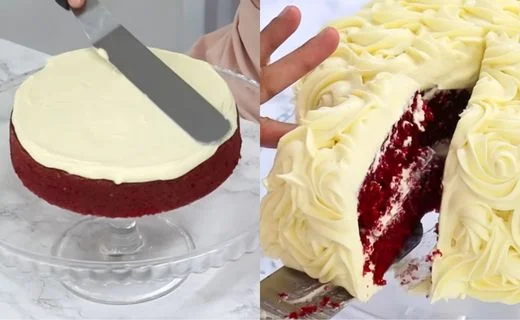
Step 10: Decorate and Serve
Smooth the frosting using a cake scraper. If desired, pipe decorative rosettes around the cake using a 1M star tip. Slice and enjoy.
Customization and Pairing Ideas
In my experience, this red velvet cake tastes amazing with fresh berries and hot coffee. I sometimes add raspberry filling between layers for extra flavor, while chopped pecans provide a delightful crunch.
1. Add Chocolate Chips
Fold mini chocolate chips into the batter for extra texture and a richer chocolate flavor that complements the cocoa notes beautifully.
2. Use Cake Flour
For an even softer crumb, replace the all-purpose flour with cake flour. This creates a lighter and more delicate texture.
3. Add Berry Filling
Spread a thin layer of raspberry or strawberry preserves between the cake layers. The fruity flavor pairs exceptionally well with cream cheese frosting.
4. Create a Layered Celebration Cake
Add an extra cake layer and increase the frosting quantity for birthdays, anniversaries, and holiday celebrations.
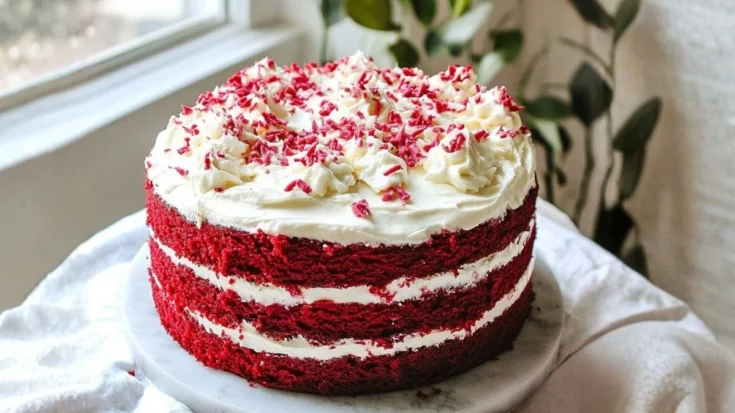
5. Serve with Fresh Berries
Fresh strawberries, raspberries, and blueberries provide a refreshing contrast to the rich frosting and enhance presentation.
6. Pair with Coffee or Tea
This red velvet cake tastes wonderful alongside freshly brewed coffee, cappuccino, espresso, or a cup of black tea. The beverages balance the sweetness perfectly.
7. Make Red Velvet Cupcakes
Use the same batter to create cupcakes. Reduce the baking time to approximately 18–22 minutes and frost individually for parties and special events.
Expert Tips for the Best Willard Scott Red Velvet Cake Recipe
From my experience, the secret to an ultra-moist red velvet cake is avoiding overmixing and using cold cream cheese for frosting, which creates a smoother, more stable finish.
1. Use Room-Temperature Ingredients
For the smoothest batter and even baking, make sure the butter, eggs, and buttermilk are at room temperature before mixing. This helps the ingredients combine properly and creates a softer cake texture.
2. Don’t Skip the Vinegar
The vinegar may seem like a small ingredient, but it’s essential in a red velvet cake. It reacts with the baking soda to create a lighter crumb and enhances the cake’s signature texture.
3. Measure Flour Correctly
Too much flour can make the cake dense and dry. Spoon the flour into your measuring cup and level it off with a knife instead of scooping directly from the bag.
4. Avoid Overmixing the Batter
Once the dry ingredients are added, mix only until everything is combined. Overmixing develops gluten, which can make the cake tough instead of soft and velvety.
5. Let the Cake Cool Completely Before Frosting
Even slightly warm cake layers can melt the cream cheese frosting. Allow the cakes to cool completely on a wire rack before assembling and decorating.
6. Use Block Cream Cheese for the Frosting
Always use firm block cream cheese rather than spreadable cream cheese. Block cream cheese creates a thicker, more stable frosting that holds its shape beautifully.
7. Chill Before Slicing
After frosting, refrigerate the cake for 20–30 minutes before cutting. This helps the frosting set and makes it easier to achieve clean, bakery-style slices.
Storage and Reheating Guidance
Store the frosted cake in an airtight container in the refrigerator for up to 5 days. Allow slices to sit at room temperature for 20–30 minutes before serving for the best texture and flavor. Unfrosted cake layers can be frozen for up to 3 months when wrapped tightly.
Willard Scott Red Velvet Cake Recipe
Rich, moist, and beautifully vibrant, the willard scott red velvet cake recipe is a timeless dessert that never fails to impress. Known for its signature red color and delicate cocoa flavor, this cake combines elegance and comfort in every slice. A great red velvet cake stands out because of its incredibly soft texture and perfectly balanced sweetness. The combination of buttermilk, cocoa powder, and vanilla creates a unique flavor profile that sits somewhere between vanilla cake and chocolate cake, making it a favorite for countless dessert lovers.
Ingredients
- 2¼ cups all-purpose flour
- 3 tablespoons corn flour (cornstarch)
- 3 tablespoons cocoa powder
- ½ teaspoon baking soda
- 1 teaspoon baking powder
- ½ teaspoon salt
- 6 tablespoons (86g) unsalted butter, room temperature
- ¾ cup unflavored vegetable oil
- 1¾ cups white granulated sugar
- 3 large eggs
- 1 tablespoon vanilla extract
- 1½ teaspoons white vinegar
- 3 to 3½ tablespoons red liquid food coloring
- 1 cup buttermilk
- 1 cup (225g) unsalted butter, room temperature
- 4½ cups icing sugar
- 1½ cups (335g) cold firm cream cheese
- 1½ teaspoons vanilla extract
- 1½ tablespoons fresh lemon juice
Instructions
Step 1: Prepare the Cake Pans
Preheat your oven to 160°C (fan forced). Grease or line two 8-inch cake tins with parchment paper.
Step 2: Mix the Dry Ingredients
Sift together the flour, corn flour, cocoa powder, baking soda, baking powder, and salt. Whisk thoroughly and set aside.
Step 3: Cream Butter, Oil, and Sugar
In a large mixing bowl, combine the butter, vegetable oil, and sugar. Beat on medium-high speed for 2–3 minutes until the mixture becomes light and creamy.
Step 4: Add Eggs and Flavorings
Add the eggs one at a time, mixing well after each addition. Scrape down the bowl as needed. Add the vanilla extract, white vinegar, and red food coloring. Mix until evenly combined.
Step 5: Combine Wet and Dry Ingredients
Add half of the dry ingredient mixture to the batter and gently fold. Pour in the buttermilk and mix lightly. Add the remaining dry ingredients and fold until just combined. Avoid overmixing.
Step 6: Fill and Bake
Divide the batter evenly between the prepared cake pans. Smooth the tops and gently tap the pans on the counter to release air bubbles. Bake for 30 minutes or until a toothpick inserted into the center comes out clean.
Step 7: Cool the Cake Layers
Allow the cakes to cool in their pans for 20 minutes. Transfer them to a wire rack and cool completely before frosting.
Step 8: Make the Cream Cheese Buttercream
Beat the room-temperature butter for 3–4 minutes until fluffy and pale.Gradually add the icing sugar in three batches, mixing on low speed after each addition. Add the cream cheese, vanilla extract, and lemon juice. Beat until smooth and creamy.
Step 9: Assemble the Cake
Place the first cake layer on a cake stand. Spread a generous amount of frosting evenly across the surface. Position the second layer on top with the flat side facing upward. Frost the top and sides evenly.
Step 10: Decorate and Serve
Smooth the frosting using a cake scraper. If desired, pipe decorative rosettes around the cake using a 1M star tip. Slice and enjoy.
Notes
Store the frosted cake in an airtight container in the refrigerator for up to 5 days. Allow slices to sit at room temperature for 20–30 minutes before serving for the best texture and flavor. Unfrosted cake layers can be frozen for up to 3 months when wrapped tightly.
Nutrition Information:
Yield:
12Serving Size:
1Amount Per Serving: Calories: 220
Frequently Asked Questions
Common willard scott red velvet cake recipe questions answered to help you understand it better.
1. How much food coloring do I need to get that iconic red color?
From our experience, using about 3 to 3½ tablespoons of liquid red food coloring gives this cake its classic vibrant red velvet appearance. If you prefer a deeper red shade, use the higher amount. We’ve found that adding less coloring still tastes great but results in a more muted reddish-brown color.
2. Can I use vegetable oil instead of butter for the cake batter?
Yes, but we wouldn’t replace all the butter. This recipe uses both butter and vegetable oil for a reason. The butter adds flavor, while the oil keeps the cake incredibly moist. We’ve tested all-oil versions before, and although they stay soft, they lose some of the rich buttery taste that makes red velvet cake so special.
3. Do I need to use self-rising flour for this recipe?
No, self-rising flour isn’t necessary. We prefer using all-purpose flour along with baking powder and baking soda because it gives us more control over the cake’s texture and rise. If you use self-rising flour, you’ll need to adjust the leavening agents accordingly.
4. Why is vinegar added to red velvet cake?
We’ve found that vinegar is one of the secret ingredients that makes red velvet cake so tender. It reacts with the baking soda and buttermilk, helping create a lighter texture while enhancing the cake’s signature flavor profile.
5. Can I make this cake ahead of time?
Absolutely. We often bake the cake layers a day ahead and store them tightly wrapped at room temperature or in the refrigerator. In fact, we’ve noticed the flavor develops even more after resting overnight.
6. Can I freeze red velvet cake?
Yes. From our experience, the unfrosted cake layers freeze beautifully for up to three months. Wrap them tightly in plastic wrap and then aluminum foil to prevent freezer burn. Thaw overnight in the refrigerator before decorating.
7. Why did my red velvet cake turn out dry?
The most common reason we’ve seen is overbaking. Even a few extra minutes in the oven can reduce moisture. We recommend checking the cake around the 28-minute mark and removing it as soon as a toothpick comes out with a few moist crumbs.
8. Can I use gel food coloring instead of liquid food coloring?
Yes, and we’ve had great results with gel coloring. Since it’s more concentrated, you’ll need much less than liquid coloring. Start with a small amount and gradually add more until you achieve your desired shade of red.
9. Can I turn this recipe into cupcakes?
Definitely. We’ve used this exact batter to make cupcakes many times. Fill cupcake liners about two-thirds full and bake for approximately 18 to 22 minutes. They’re perfect for parties and special occasions.
10. Why is my cream cheese frosting runny?
In our experience, runny frosting usually happens when the cream cheese is too soft or overmixed. We always use cold, firm block-style cream cheese and mix only until smooth. This helps create a thick, stable frosting that’s easy to spread and pipe
This willard scott red velvet cake recipe delivers everything you could want in a homemade dessert—soft layers, vibrant color, rich flavor, and luscious cream cheese buttercream frosting. Whether you’re baking for a celebration or simply treating yourself, this cake is guaranteed to impress. Give it a try, share it with family and friends, and let us know how your red velvet masterpiece turned out in the comments below!
You can also follow us on Pinterest, and YouTube for more delicious updates and kitchen inspiration. Your feedback and support mean the world to us!