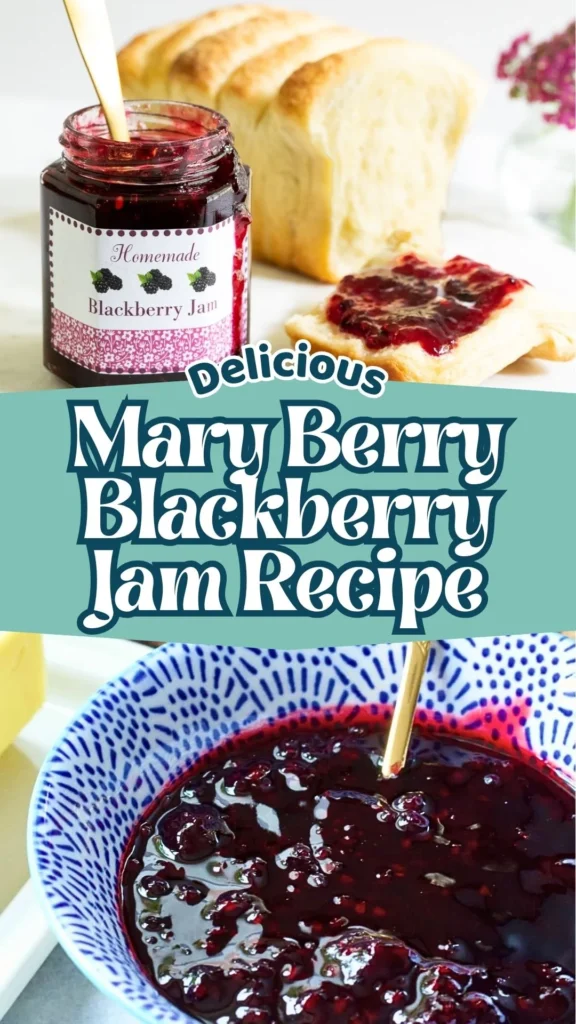
Homemade blackberry jam brings the rich, sweet-tart flavor of fresh berries straight to your breakfast table. This Mary Berry blackberry jam recipe uses simple ingredients and a traditional cooking method to create a beautifully thick, flavorful preserve that’s perfect for everyday use.
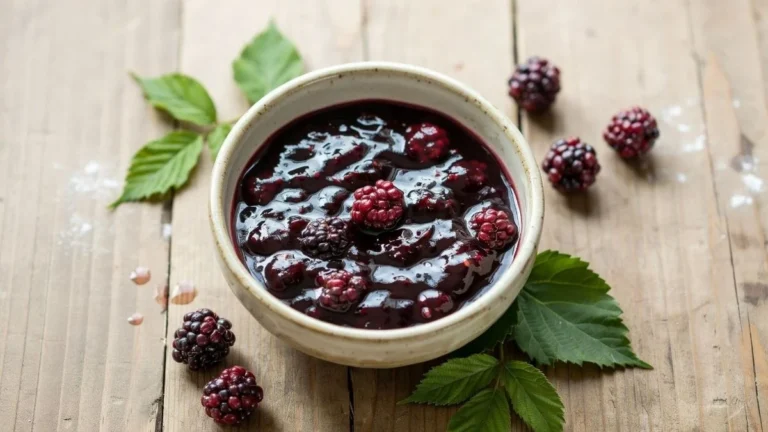
Fresh blackberries and sugar work together to produce a jam with a deep berry taste and a gorgeous jewel-like color. Since this recipe relies on the fruit’s natural properties rather than added pectin, the result is a wonderfully authentic homemade texture that many jam lovers prefer. We can pair it with Our walnut bread, cornbread, and bread pudding for sweet, versatile serving.
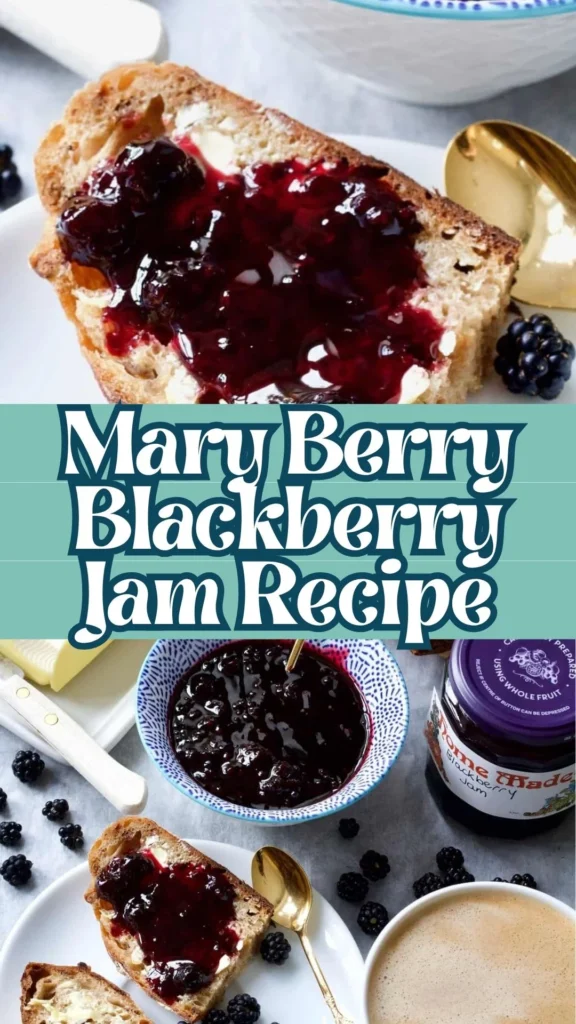
Perfect for spreading on toast, spooning over desserts, or serving with warm scones, this easy blackberry jam recipe is a fantastic way to make the most of blackberry season. The straightforward process makes it suitable for both beginners and experienced home cooks alike.
My Experience and How Does This Recipe Taste
The first time I made this Mary Berry-inspired blackberry jam, I was amazed by how simple the process was. Watching the berries slowly break down into a rich, glossy mixture filled my kitchen with the unmistakable aroma of fresh summer fruit.
The taste is wonderfully balanced. Blackberries naturally offer a combination of sweetness and gentle tartness, creating a jam that feels vibrant rather than overly sugary. The optional touch of vanilla adds a subtle warmth that complements the berries beautifully without overpowering them.
Texture-wise, this jam is smooth yet pleasantly rustic, with tiny bits of blackberry throughout. It spreads easily on bread, pairs wonderfully with scones, and adds a burst of fruity flavor to desserts. Every spoonful tastes homemade, fresh, and comforting.
Mary Berry Blackberry Jam Ingredients
- 1 kg fresh blackberries
- 800 g fine sugar
- 1 teaspoon vanilla essence or vanilla extract (optional)
Kitchen Utensils Needed
- Large heavy-bottomed pot
- Wooden spoon or silicone spatula
- Potato masher or fork
- Measuring scale
- Small plate for wrinkle test
- Sterilized glass jars with lids
- Ladle or funnel
- Clean kitchen towel
Preparation and Cooking Time with Serving
- Preparation Time: 10 minutes
- Cooking Time: 25 minutes
- Total Time: 35 minutes
- Servings: Approximately 40 servings
- Yield: About 4–5 medium jars of blackberry jam
Mary Berry Blackberry Jam Recipe Steps
Step 1: Prepare the Blackberries
Wash the blackberries thoroughly under cold running water.
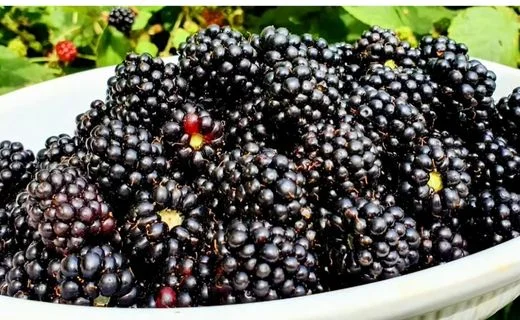
Remove any leaves, stems, or damaged berries. Drain well before cooking.
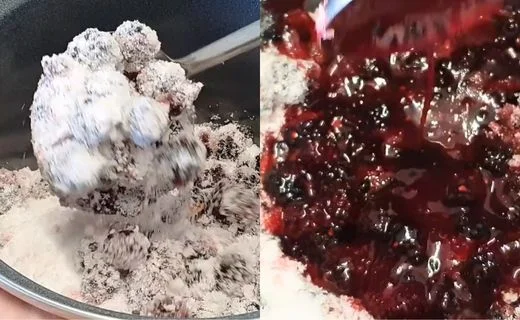
Step 2: Cook the Fruit
Place the blackberries into a large pot over medium heat. As they begin to soften, gently mash them with a potato masher or fork. Continue cooking until the berries release their juices and break down.
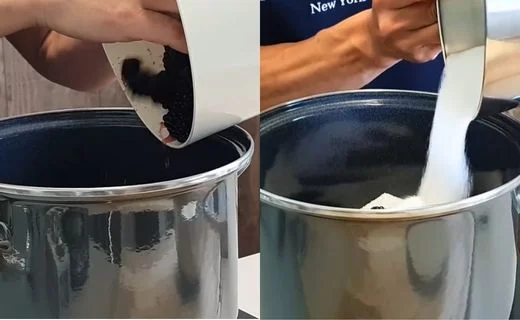
Step 3: Add the Sugar
Pour the fine sugar into the pot and stir continuously. Keep stirring until all the sugar has completely dissolved into the fruit mixture.
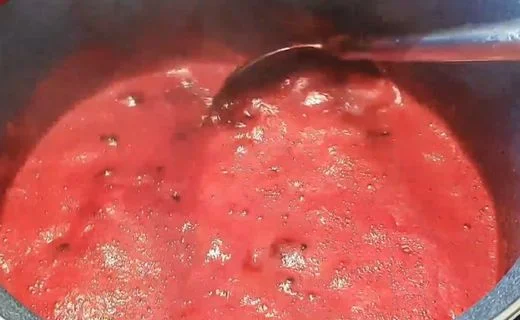
Step 4: Bring to a Boil
Increase the heat and bring the mixture to a rolling boil. Once boiling, reduce the heat slightly and allow it to simmer.
Step 5: Simmer Until Thickened
Cook the jam for 15–25 minutes, stirring regularly to prevent sticking. The mixture will gradually thicken as excess moisture evaporates.
Step 6: Test the Setting Point
Place a small spoonful of jam onto a chilled plate. Wait for a few seconds, then gently push it with your finger. If the surface wrinkles, the jam is ready.
Step 7: Add Optional Vanilla
If using vanilla extract or essence, stir it into the jam after reaching the desired consistency. Mix thoroughly.
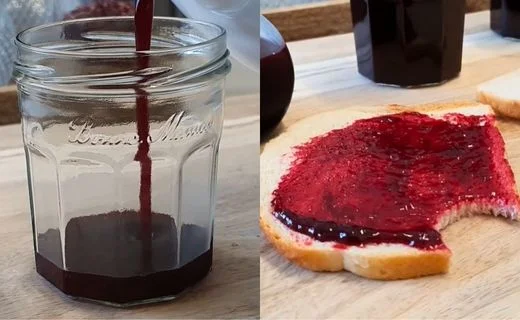
Step 8: Jar and Cool
Carefully pour the hot blackberry jam into sterilized jars. Seal immediately and allow the jars to cool completely before storing.
Customization and Pairing Ideas
I love adding a splash of vanilla and serving this blackberry jam with warm scones or toast. It also pairs beautifully with creamy yogurt, soft cheeses, and homemade pancakes for extra flavor.
1. Add a Hint of Citrus
A tablespoon of fresh lemon juice can brighten the blackberry flavor and add a refreshing tang to the finished jam.
2. Create a Vanilla Blackberry Jam
Adding vanilla essence or pure vanilla extract creates a richer flavor profile. The subtle sweetness of vanilla complements the berries exceptionally well.
3. Mix Different Berries
Try combining blackberries with raspberries, blueberries, or strawberries. Mixed berry jam offers more complexity and a beautiful color.
4. Serve with Fresh Scones
This blackberry jam is a natural companion for warm homemade scones. Add a dollop of clotted cream for a traditional British-style afternoon tea experience.
5. Pair with Cheese Boards
The sweet-tart flavor works beautifully alongside creamy brie, goat cheese, or aged cheddar. A spoonful of blackberry jam can elevate any cheese platter.
6. Use as a Dessert Topping
Drizzle the jam over cheesecake, vanilla ice cream, pancakes, waffles, or rice pudding. It adds natural fruit flavor and visual appeal.
7. Turn It into a Breakfast Spread
Spread it over toast, croissants, English muffins, or bagels. You can also swirl it into oatmeal, yogurt, or smoothie bowls for an easy breakfast upgrade.
Tips for Making the Best Mary Berry Blackberry Jam Recipe
From my experience, avoid rushing the boiling stage. Stir regularly and use the cold plate wrinkle test for perfect consistency—overcooking can make blackberry jam too thick once cooled.
1. Use Fully Ripe Blackberries
For the best flavor, choose ripe, dark blackberries that are naturally sweet and juicy. Ripe berries create a richer taste and help achieve the perfect jam consistency.
2. Mash the Fruit Gently
As the blackberries soften, mash them gently rather than blending them completely. This preserves some texture and gives the jam a more homemade appearance.
3. Dissolve the Sugar Completely
Before bringing the mixture to a boil, make sure the sugar has fully dissolved. Undissolved sugar can lead to a grainy texture in your finished blackberry jam.
4. Stir Frequently During Simmering
Regular stirring prevents the jam from sticking to the bottom of the pot and helps ensure even cooking throughout the process.
5. Use the Cold Plate Test
Always test the jam on a chilled plate before removing it from the heat. If the surface wrinkles when pushed with your finger, the jam has reached the correct setting point.
6. Sterilize Your Jars Properly
Clean and sterilized jars help extend the shelf life of your Mary Berry blackberry jam recipe and reduce the risk of spoilage.
7. Let the Jam Cool Undisturbed
After sealing the jars, allow them to cool completely without moving them. This helps the jam finish setting and creates a better texture for spreading.
Storage and Reheating Guidance
Store sealed jars in a cool, dark place until opened. Once opened, keep the blackberry jam refrigerated and use within 3 to 4 weeks. If desired, gently warm a portion in the microwave for a few seconds to make spreading easier. Unopened jars can last several months when properly sealed.
Mary Berry Blackberry Jam Recipe

Homemade blackberry jam brings the rich, sweet-tart flavor of fresh berries straight to your breakfast table. This Mary Berry blackberry jam recipe uses simple ingredients and a traditional cooking method to create a beautifully thick, flavorful preserve that’s perfect for everyday use. Fresh blackberries and sugar work together to produce a jam with a deep berry taste and a gorgeous jewel-like color. Since this recipe relies on the fruit’s natural properties rather than added pectin, the result is a wonderfully authentic homemade texture that many jam lovers prefer.
Ingredients
- 1 kg fresh blackberries
- 800 g fine sugar
- 1 teaspoon vanilla essence or vanilla extract (optional)
Instructions
Step 1: Prepare the Blackberries
Wash the blackberries thoroughly under cold running water. Remove any leaves, stems, or damaged berries. Drain well before cooking.
Step 2: Cook the Fruit
Place the blackberries into a large pot over medium heat. As they begin to soften, gently mash them with a potato masher or fork. Continue cooking until the berries release their juices and break down.
Step 3: Add the Sugar
Pour the fine sugar into the pot and stir continuously. Keep stirring until all the sugar has completely dissolved into the fruit mixture.
Step 4: Bring to a Boil
Increase the heat and bring the mixture to a rolling boil. Once boiling, reduce the heat slightly and allow it to simmer.
Step 5: Simmer Until Thickened
Cook the jam for 15–25 minutes, stirring regularly to prevent sticking. The mixture will gradually thicken as excess moisture evaporates.
Step 6: Test the Setting Point
Place a small spoonful of jam onto a chilled plate. Wait for a few seconds, then gently push it with your finger. If the surface wrinkles, the jam is ready.
Step 7: Add Optional Vanilla
If using vanilla extract or essence, stir it into the jam after reaching the desired consistency. Mix thoroughly.
Step 8: Jar and Cool
Carefully pour the hot blackberry jam into sterilized jars. Seal immediately and allow the jars to cool completely before storing.
Notes
Store sealed jars in a cool, dark place until opened. Once opened, keep the blackberry jam refrigerated and use within 3 to 4 weeks. If desired, gently warm a portion in the microwave for a few seconds to make spreading easier. Unopened jars can last several months when properly sealed.
Nutrition Information:
Yield:
10Serving Size:
1Amount Per Serving: Calories: 70
Frequently Asked Questions
Find clear answers to the top questions about Mary Berry Blackberry Jam Recipe.
Why do I need to add lemon juice to blackberry jam?
In our experience, lemon juice isn’t absolutely necessary for this blackberry jam recipe, but it can be helpful. It adds a touch of acidity that brightens the blackberry flavor and may help the jam set more reliably. When our blackberries are especially sweet, we like adding a tablespoon of lemon juice to balance the taste.
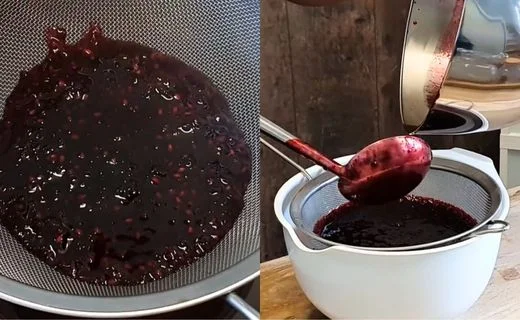
Do I need to remove the seeds from blackberries before making jam?
Not necessarily. We’ve made this recipe many times without removing the seeds, and the texture is still delicious. However, if you prefer a smoother jam, you can press the cooked berries through a fine-mesh sieve before adding the sugar. This creates a seedless blackberry jam that’s easier to spread.
Can I use frozen blackberries?
Yes, absolutely. We’ve successfully made this jam with frozen blackberries when fresh berries weren’t in season. Simply thaw them first and drain any excess liquid if needed. The flavor remains excellent, and the cooking process stays largely the same.
How do I know when my blackberry jam is ready?
The wrinkle test has always worked best for us. Place a small spoonful of jam on a chilled plate and let it sit for a few seconds. When you push it gently with your finger, the surface should wrinkle. That’s usually a good sign that the jam has reached the proper setting point.
Why is my blackberry jam too runny?
From our experience, runny jam usually needs a little more cooking time. The mixture may not have reduced enough to reach the setting point. Continue simmering for a few extra minutes and test again using the cold plate method.
Can I reduce the amount of sugar?
You can, but we’ve found that reducing the sugar significantly affects both the texture and shelf life of the jam. Sugar helps preserve the fruit and contributes to proper setting. If you want a lower-sugar version, expect a softer consistency.
How long does homemade blackberry jam last?
When stored in properly sterilized and sealed jars, we’ve found that unopened blackberry jam can last for several months in a cool, dark place. Once opened, it’s best kept in the refrigerator and enjoyed within 3 to 4 weeks.
Can I add vanilla to blackberry jam?
Yes, and we highly recommend trying it at least once. A small amount of vanilla extract adds warmth and depth without overpowering the blackberry flavor. It’s one of our favorite variations when making this recipe for gifting.
What can I serve with blackberry jam?
We love serving blackberry jam with warm toast, homemade scones, croissants, and English muffins. It also tastes fantastic swirled into yogurt, spooned over cheesecake, or paired with soft cheeses on a charcuterie board.
Do I need pectin for this blackberry jam recipe?
No, this recipe works well without added pectin. In our experience, the natural pectin found in blackberries, combined with the sugar and proper cooking time, creates a lovely jam consistency. The key is allowing the mixture to simmer until it reaches the setting point.
This Mary Berry blackberry jam recipe is proof that homemade preserves don’t need complicated ingredients or special equipment. With fresh blackberries, sugar, and a little patience, you can create a delicious jam packed with natural berry flavor.
Give this recipe a try and enjoy a taste of homemade goodness on your favorite breads, desserts, and breakfasts. If you make it, share your results and favorite serving ideas in the comments!
You can also follow us on Pinterest, and YouTube for more delicious updates and kitchen inspiration. Your feedback and support mean the world to us!